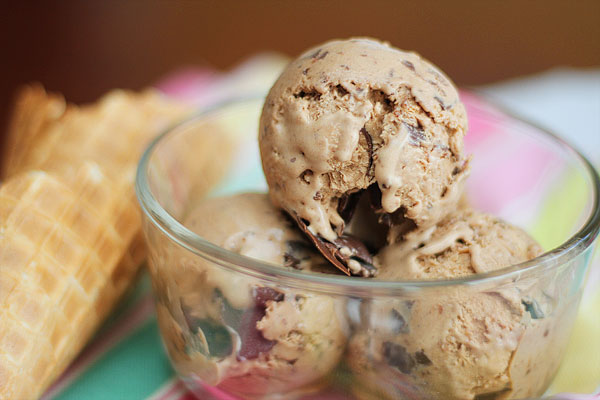
Coffee Ice Cream Recipe
Coffee is a versatile ingredient that can be incorporated into cakes, biscuits, chocolates, lollies, and best of all – ice cream! Coffee ice cream combines the sweetness of ice cream with the rich flavour of coffee, in the best way possible.
It’s surprisingly simple to make a high-quality coffee ice cream at home. In this post, we share an easy ice cream recipe that tastes just like old-fashioned ice cream.
This recipe combines custard with heavy cream and coffee to create a ridiculously creamy treat that your friends and family will love.
Coffee ice cream recipe ingredients
To make coffee iced cream, you will need:
- 600ml of whole milk
- 540ml of double cream
- 300g of granulated sugar
- 1 pinch of salt
- ½ cup fresh brewed coffee
- 6 egg yolks
- 1 ½ teaspoons vanilla extract
- An ice cream maker
If you want a larger batch of coffee ice cream (and let’s face it, who doesn’t!?) then simply double the ingredients we listed above.
How to make coffee ice cream: step by step instructions
Here are detailed instructions on how to make coffee ice cream. There are also simplified instructions further down the page. It involves three simple steps:
Step 1: make a custard base
The first step for making our easy coffee ice cream recipe is to create a coffee custard. It is a basic combination of a ½ cup of coffee, 300g of sugar, 600ml of milk, and a pinch of salt. You can use decaf coffee for this recipe if you prefer — which might be a good idea if kids are going to be eating it.
Next, whisk your egg yolks in a small bowl and slowly pour half of the hot milk into the eggs as you continue whisking. You can then pour the eggs and milk back into the saucepan. Don’t pour the eggs directly into the hot saucepan, as they will scramble.
Continue cooking the custard over medium heat until it thickens, which will take about 5 minutes. Stir occasionally to ensure the custard doesn’t stick to the pan.
Step 2: refrigerate your custard
Next, refrigerate the custard. However, before doing so, remove any lumps contained within the custard. Even if you were careful to not scramble the eggs, you may have still made a couple of lumps. Strain the custard through a fine mesh sieve into another plastic or glass bowl.
Cover your bowl with plastic wrap, ensuring that the plastic is touching the surface of the custard (to prevent a skin forming). Place the custard into the refrigerator for at least two hours.
Step 3: churn your ice cream
To finish your ice cream off, you will need to whisk the custard, ice cream, and vanilla together before placing it into your ice cream machine for churning. Once your ice cream has finished churning, enjoy it immediately or place it in the freezer in an airtight container. It should keep for about two weeks.
Pro-tips for making homemade coffee ice cream
Here are a few additional pro-tips to help you make the best coffee ice cream possible:
Use high-quality ingredients
Don’t skimp on your ice cream ingredients. Use free-range eggs, high-quality milk, and the best coffee you can find (hint: you’ll find plenty with our coffee subscription box).
Add additional flavourings early
If you have some ideas for additional flavourings like choc chips or hazelnut syrup, add them when the cooked custard has cooled. This will ensure their flavours remain strong in the final ice cream. This is particularly true of alcoholic flavourings and extracts.
Chill your custard well
Make sure the custard is ‘very’ cold before churning. Some people will even keep their custard in the refrigerator overnight before churning.
Freeze your bowl
Some ice cream makers will have a detachable mixing bowl. If your does, pop it in the freezer so it is very cold before you start churning.
Keep mix-ins small
If you decide to add nuts or other additions to your coffee ice cream, make sure they are fairly small. It’s also a good idea to chill any additives before through them in.
Thanks for discovering how to make coffee ice cream with us! For more posts on the many ways you can use coffee, visit our blog.


25% off
your next order
Enjoy the world's best coffee, freshly roasted & delivered to your door. Sign up to our mailing list for a welcome pack and 25% off your next Cafédirect order!
Thanks for
joining our
mailing list
A welcome pack is on its way and you get 25% off your next Cafédirect order!